Direct to Film printing had an amazing lifetime, colour and feel. But to optimise the look and feel of the prints, you can use the following techniques:
Direct to Film (DTF) Colour Knock Out Procedure Explained
Purpose: Direct to Film (DTF) prints have a slight plastic feel, some better than others and can be affected by numerous things, like the quality of your ink, white in levels and adhesive powder used. The purpose of knocking out a colour for pressing is to use the source colour of the garment to provide a section of colour. This allows for better breathing, feel and wear of the print on the garment.
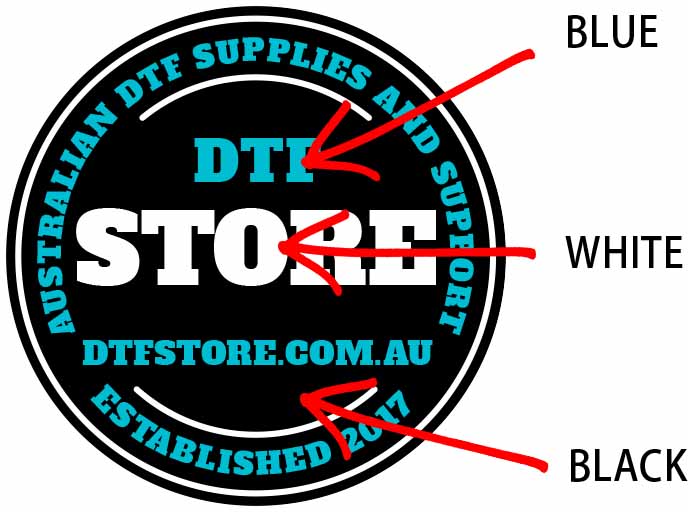
For the purposes of example we will use the DTF Store logo. With Black, White and Blue it provides a great example for understanding the process.

The maximum effect for this procedure will be achieved when pressing this logo onto a Black garment, by removing the Black pixels and making them transparent, the garment will provide the Black and the logo will be very non intrusive and feel much lighter than the solid logo.
You will require graphic editing software to achieve this process like photoshop or similar to be able to select the colour that you want to knock out and remove those pixels. An example of the logo without the Black pixels is shown below.

Black Pixels removed for softer feel and air flow
As you can see, (squares behind the logo represent the transparent area (not printed) ) the majority of the print is removed leaving a flexible, breathing soft feel print that will look amazing.
Knocking out colours understandably depends on the garment it is being pressed on. Examples below show the other colour knock outs that can be done with the use of a White or Blue garment.
White Knockout image shown for pressing the Direct to Film (DTF) print onto a White garment (e.g. T-Shirt).

White Pixels removed for softer feel and air flow
Blue Knockout image shown for pressing the Direct to Film (DTF) print onto a Blue garment (e.g. T-Shirt).

How to remove colours from an image for softer feel Direct to Film (DTF) Prints.
Using Photoshop as the example, the Magic Wand tool is used my many people, but a little unknow fact is that you can select all of the selection in the document, not only the connected pixels by removing the contiguous setting on the tool.
- Open the image and resize to the print size required. (Do this before rasterising the image to maintain quality).
- Make sure the image is rasterised, or it will not let you delete the pixels in the embedded image.
- Select the Magic Wand tool.
- Untick the contiguous box so that all colours in the document are selected.
- Adjust the tolerance to determine how much of that colour and similar colours are removed. A good start is 60, reduce to stay closer to the colour selected increase to include similar colours.
- Delete the selection and save as PNG.
Now you have your print ready file optimised for look, feel and air flow for end user comfort.
